Using the Add/Edit Video Suite
July 12, 2024
This resource shows how to add and manage a video file in Add/Edit as well as sharing, using the Unbrander tool, viewing analytics and creating media.
Subscribers may upload one (1) MP4, MOV or AVI video per listing with a maximum video file size is 300MB to your listing’s photo/video page. In Matrix and Flexmls, the video will display as a Virtual Tour link.
Adding video files to the Add/Edit Photo(s)/Video Tab
While only one video file can be uploaded to Add/Edit, one additional URL for either a video or virtual tour (e.g., /virtualtourprovider.com/) can also be loaded. If you are adding a URL to a virtual tour, the process has not changed. However, video files must be added in the Photos(s)/Video tab and upload times will vary depending on the length and file size for your video and your available internet bandwidth.
Adding a Video to Your Listing
Video format: The Video Suite is optimized for landscape video at this time.
To add a video to your listing:
- In the Media tab, click the blue circle with the plus sign (+) in the lower right corner of the screen.

- Select the video button.
![]()
- Select Click to select a video.
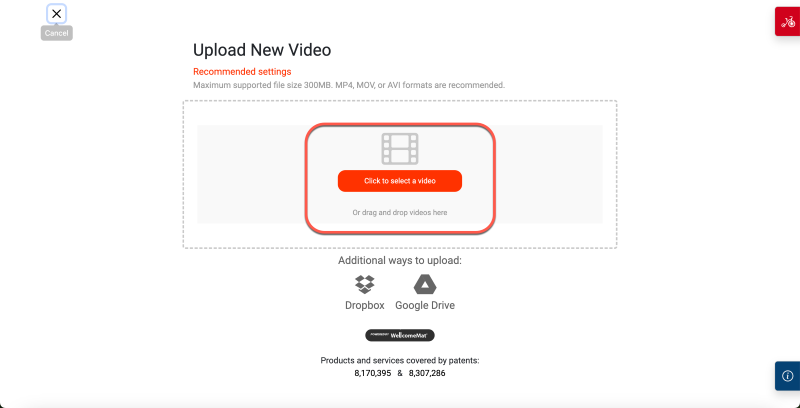
- Select the video to upload or drag-and-drop the video into the uploader. A visual indicator of upload progress will display. Before the upload is complete, you can cancel it.The video will appear on the Photos/Video page, displaying its current status. It will also be added automatically as a virtual tour. Note: You can only have two (2) virtual tours. A banner will notify whether or not your video was successfully uploaded and added to your virtual tours.
- If you already had the maximum number of virtual tours, you will have to manually add it. First, delete one of your tours by clicking the Delete button on an existing virtual tour, or click on one of the existing virtual tours and then select Replace to add your video.
- Once the video is completely processed (“Active”) it is ready for use and may be edited further.
Note: If there is already a video uploaded, the add button will display “Manage Video” instead of “Add Video.” From there a user may replace or delete the existing video.
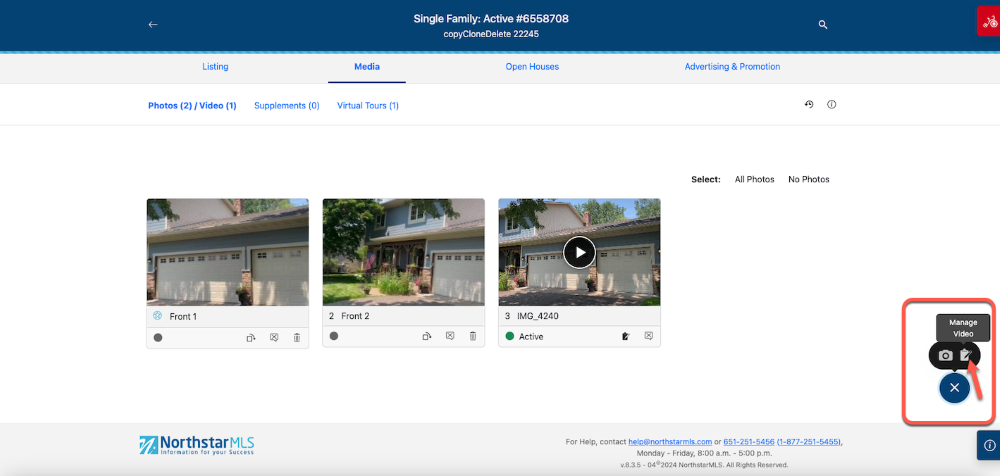
Managing a Video
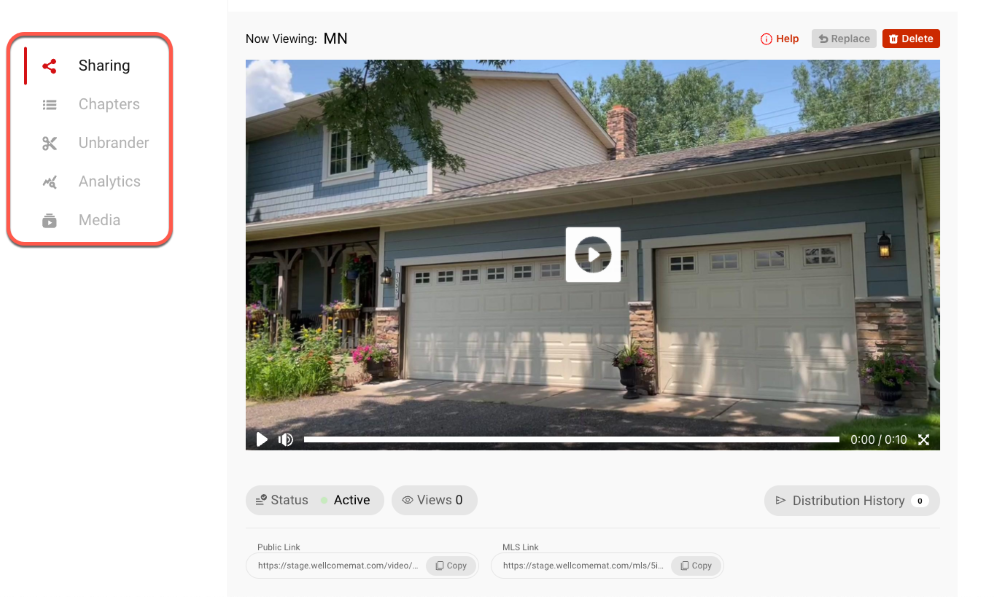
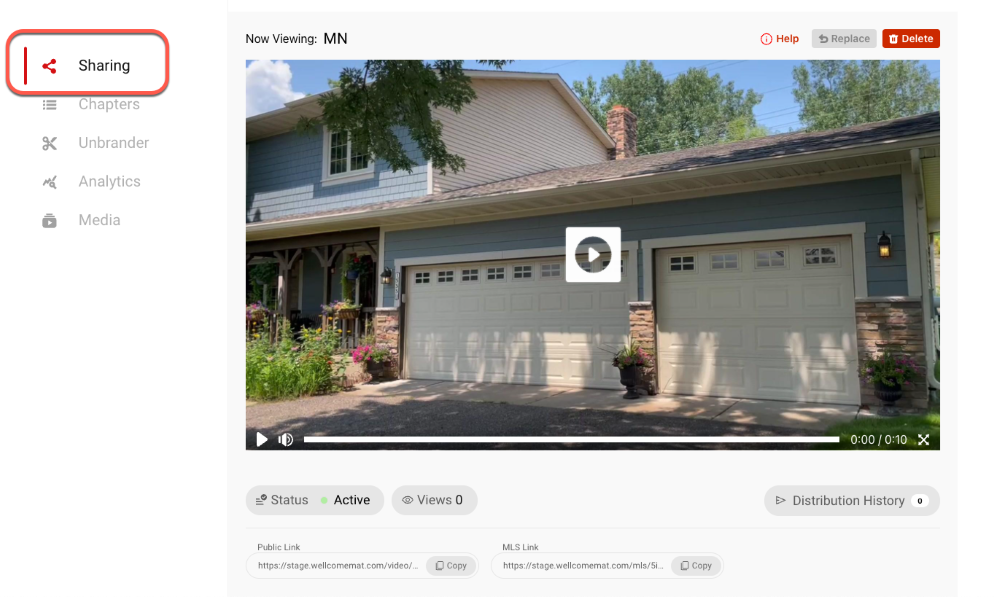
The “Manage Video” button will launch the WellcomeMat overlay which provides the following functionality:
Sharing: The status, distribution history, public video link and MLS video link are located here. Users can also view the uploaded video via this tab. This page allows users to replace their video or delete their video as well.
Chapters: Enter or edit video chapters to enable viewers to find, watch, and share the most important portion(s) of the videos.
Unbrander: This allows you to remove sections of uploaded video to remove branding.
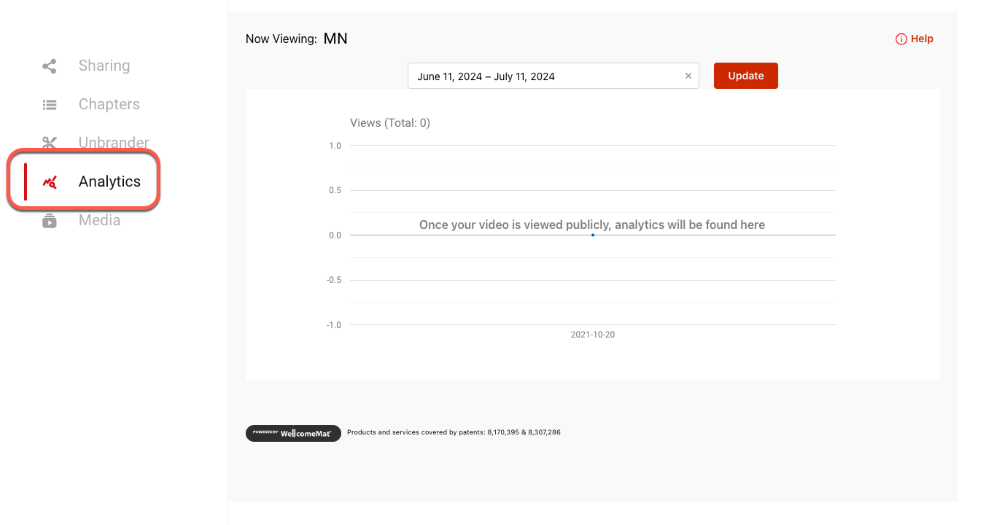
Analytics: This is where statistics regarding the uploaded video (such as total views over time) are displayed.
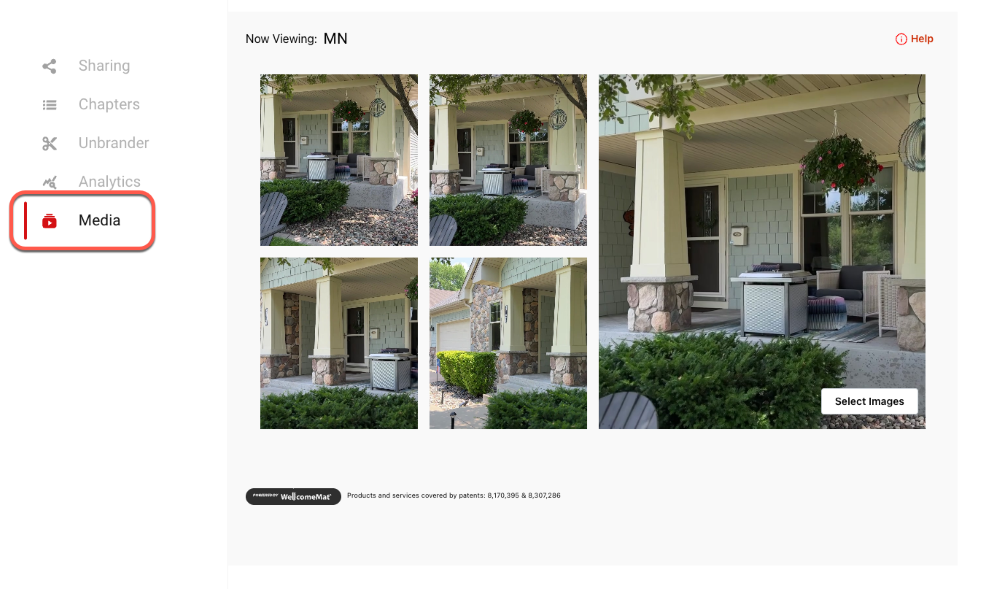
Media: Here is where downloadable screenshots can be pulled from the uploaded video.
In Add/Edit:
Captioning: The speech bubble with an “x” deletes the video’s caption. A user can also edit the caption by clicking into the gray caption bar.
History: This button will open an overlay that displays the most recent changes, who made them, and at what time/day. Any video uploaded will display the user on record as “Wellcomemat.”

Sharing
- Only the listing agent can share the video to social media.
- Click Help for valuable information for each section
- Replace or Delete the video.
- Click the play arrow to watch your video.
- See video Status, number of Views, and Distribution History (if shared on social media). The Public Link links to your branded videos. You can use this to upload or link videos to your own marketing materials and professional sites. Do not upload branded videos to the MLS. See the Unbrander section for more details.
- The MLS Link link is what shows on your listing. If you need to use the Unbrander tool to edit, the MLS link will automatically update to your compliant, edited version. You can also manually copy and paste the link.
- To auto-distribute video content to YouTube, your Facebook Business page, or other social media:
- Select the platform, then click the Connect button and enter your username and password for each account.
- For YouTube, select your Privacy settings: Private, Unlisted, or Public. Add a title and description, then select a date and time to post the video.
- Click Save to connect WellcomeMat to your accounts.
Once connected, these distribution options will be available every time you upload a video.
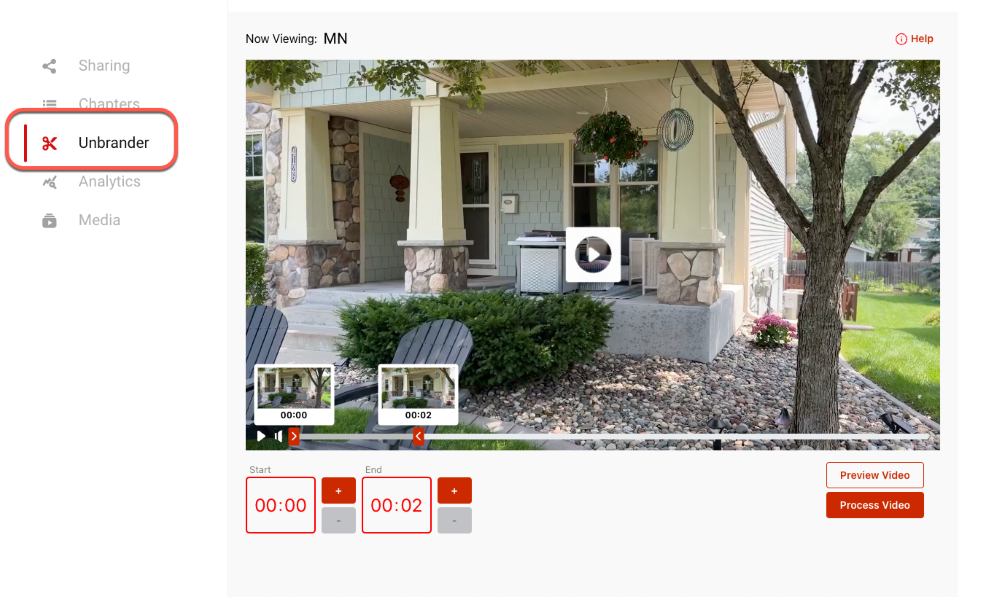
Unbrander
To create an unbranded version of your video, choose a new start and finish time by moving the play heads (red boxes with arrows pointing left and right), or using +/- signs in the Start and End fields. This will remove any branding you’ve included at the start or end of your video. Click Process Video to update. This version will be saved as the MLS Link of the “Sharing” section.
Analytics
Get valuable analytics on your videos, such as Total Views within a certain timeline, Player Impressions, and Traffic Sources (indicating where the video was viewed). If you distribute on social media, the system captures those views and adds them to this section.
Views: Total number of video views by date range. Select a different date range and click Update to look at a different time period.
Player Impressions: Percentage of video “Loads” and “Views.”
Traffic Sources: The online locations where the video was viewed.
Media
For every one second of video uploaded, the system will provide you with one high-definition image. For example, a 2-minute video will generate 120 images to choose from.
- Click on Media and the Select Image button.
- Click the checkbox to select the images and then click on the Download File button.
- Name the file and select where to save them, and then click the Save button. Photos will be downloaded into a Zip file to your designated location.
Visibility on Partner Sites
When properly loaded as one of two virtual tours in your listing, your video will be visible on NorthstarMLS Matrix and Flexmls systems in the Virtual Tour section. However, visibility on partner websites may vary depending on whether they allow for virtual tours or not.

Explore Training Library
Ensure you're in compliance with Rules & Regulations articles from NorthstarMLS. Whether you're looking for the latest in Rules & Regulations or historical information to help you succeed, our resources are a one-stop shop.
Discover Matrix
The latest version of MatrixTM from CoreLogic® features an array of exciting updates and refinements that will help take your daily workflows to the next level.
viewCumulative Days on Market (CDOM): Matrix
This guide provides information regarding cumulative days on market in the Matrix system.
viewDays on Market at Most Recent List Price (PDOM): Matrix
This guide provides information regarding days on market at the most recent list price in the Matrix system.
view